Booting Raspberry Pi with FlashAir
Contributor: Hirameki Sora
Latest update: March 2016
Combine Raspberry Pi and FlashAir
Raspberry Pi can boot from the SD card and FlashAir is an SD card. I wanted to take advantage of the FlashAir that was inserted in the Rasberry Pi and make full use of the Raspberry Pi.
Operating environment (required equipment )

- Raspberry Pi....... Body. (if B+, try FlashAir using microSD⇒SD conversion cable.)
- FlashAir............... Initialized in the PC tool.
- USB SDcard Writer. Required to edit of the FlashAir.
- SDcard................. Where Raspberry Pi of the boot is already installed.
- Monitor, keyboard, mouse
- USB hub.............. if there are not enough USB ports
In the above configuration, you will also need to have your Raspberry Pi configured to
- 「booted from the SD card」,
- 「have X-Windows running」,
- 「connected to the Internet via the LAN」,
to complete the setup.
1. Copy the FlashAir's system folders
After initializing the FlashAir there are two folders on the FlashAir,
- ”\DCIM”
- ”\SD_WLAN”(Hidden folder)
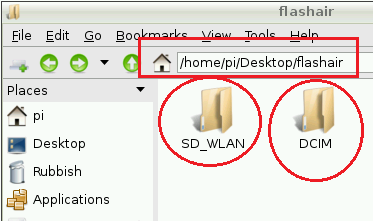
Since the above 2 folders are required for the FlashAir's wireless to function we need to save them. Create a storage folder (="/home/Pi/Desktop/flashair") for example and copy the two folders there.
2. Create the Raspberry Pi Boot Image on the FlashAir
Now you can write the OS image for the Raspberry Pi to the initialized FlashAir. After that, you copy the 2 folders that you just saved to the 「/boot」 folder of FlashAir and the wireless LAN function of FlashAir will work.
Let's detail process...
2-1 Deployment to the desktop of Raspbian
Download the image of the Raspberry Pi via the Internet. Although there are various boot image, this time was to 「Rasbian」 .
Save the latest version of 「Rasbian」(=”2015-05-05-wheezy-raspbian.zip”) that you downloaded from the download site to the appropriate download location. Please note the image is approximately 3GB. As an example, tried to save to ”/home/Pi/Desitop/flashair”.
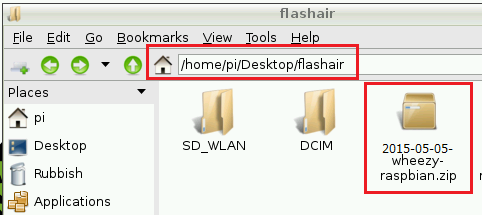
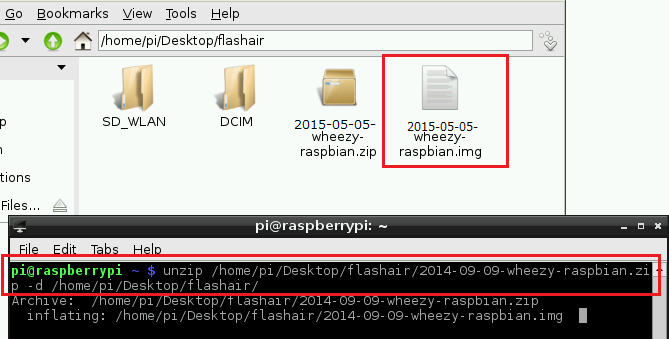
In addition, extract the ZIP file that you saved.
$unzip /home/Pi/Desktop/flashair/2015-05-05-raspbian.zip –d /home/Pi/Desktop/Flashair
2-2 Deployment of Raspbian to FlashAir
Now we write the Raspian disk image to the FlashAir(=”/dev/sdc”) that is plugged into your USB SDcard Writer.
$sudo dd if=/home/Pi/Desktop/flashair/2015-05-05-wheezy-raspbian.img of=/dev/sdc

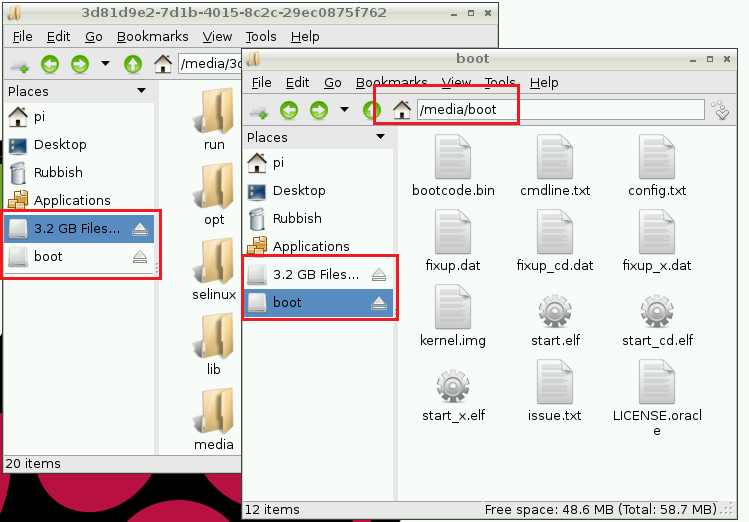
When writing the image has finished, disconnect the FlashAir from USB SDcard Writer and insert it again. The contents of the Image should be now on the FlashAir. ⇒「/media/boot」, 「/media/xxxxx-xxxxx」
2-3 Modifying the FlashAir partitions
The partitions used in the Rasbian are not appropriate for the FlashAir so we will edit them with ”
gparted
”.
※If you do not have gparted installed, we will first install it.
$ sudo apt-get install gparted
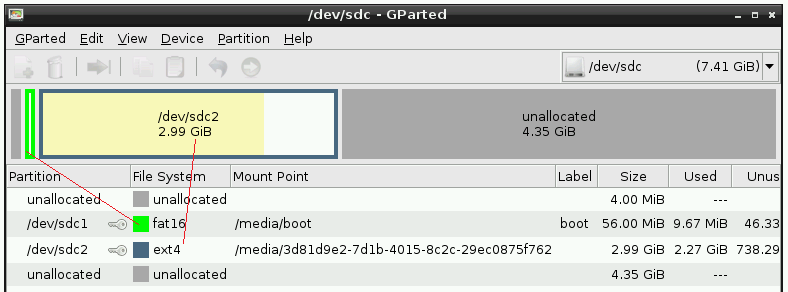
Change partition size.
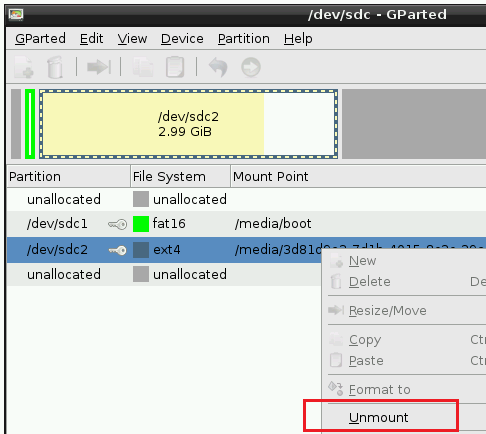
First let's change of ext4 side. After selecting "Unmount" via right-click menu, Extend the right edge of the area frame to the right further and set it to all of the area.
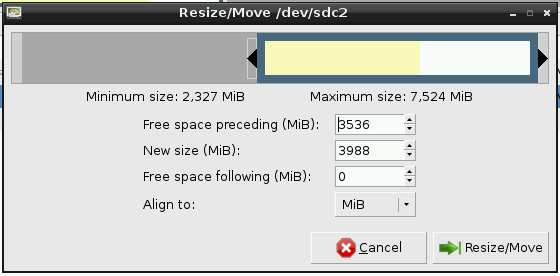
Select ”Resize/Move” in the right-click menu, and then edit the area of ext4 side.
Then you can change the FAT partition. Again, select "Unmount" in the right-click menu.
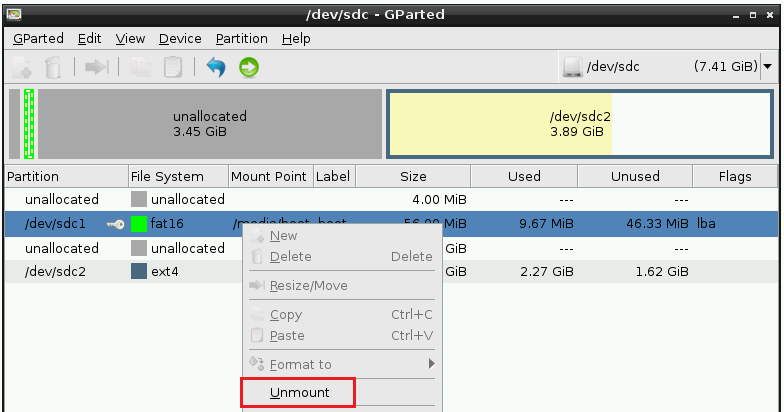
Then, select the ”Resize/Move” in the right-click menu and edit the area of the FAT partition to be all of the empty area. Area vacant Let assigned to all fat16.
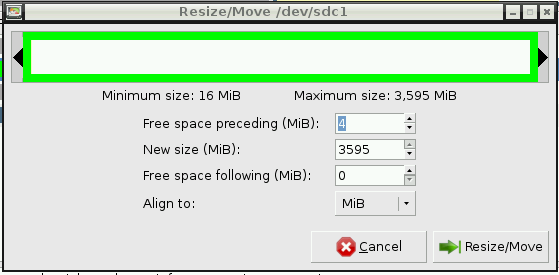
Or more, tried to change the 「ext4」, 「fat16」 side of the partition to fifty-fifty.
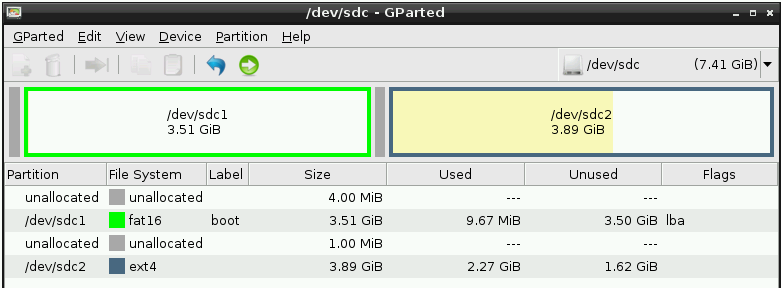
After saving the partitions, remove the FlashAir from the USB SDcard reader and insert again.
3. Restore the saved FlashAir directories.
On the FlashAir that plugged into the USB SDcard Writer, there will be new mounted directories「/media/boot」 and 「/media/xxxxx-xxxxxx」. You need to copy the saved folders to the 「/media/boot」folder (or FAT partition).
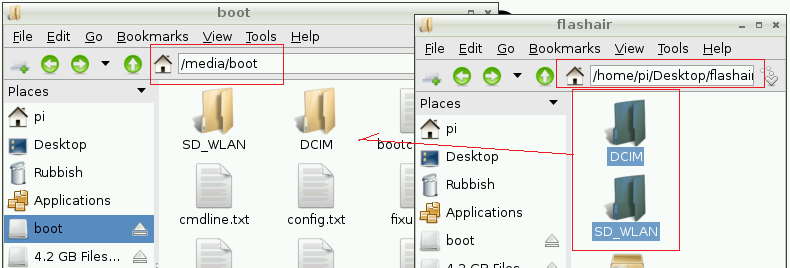
Turn off the power of the Raspberry Pi when the copy is complete.
4. Restart of the Raspberry Pi with the FlashAir
Soon is the goal.
Remove the FlashAir edited by the USB SD Card Writer and and insert it to the SD card slot of the
Raspberry
Pi side and turn it on. After the system automatically starts the FlashAir with it's internal wireless
function
you can access the contents of the 「/boot」 folder via a smartphone, etc. !
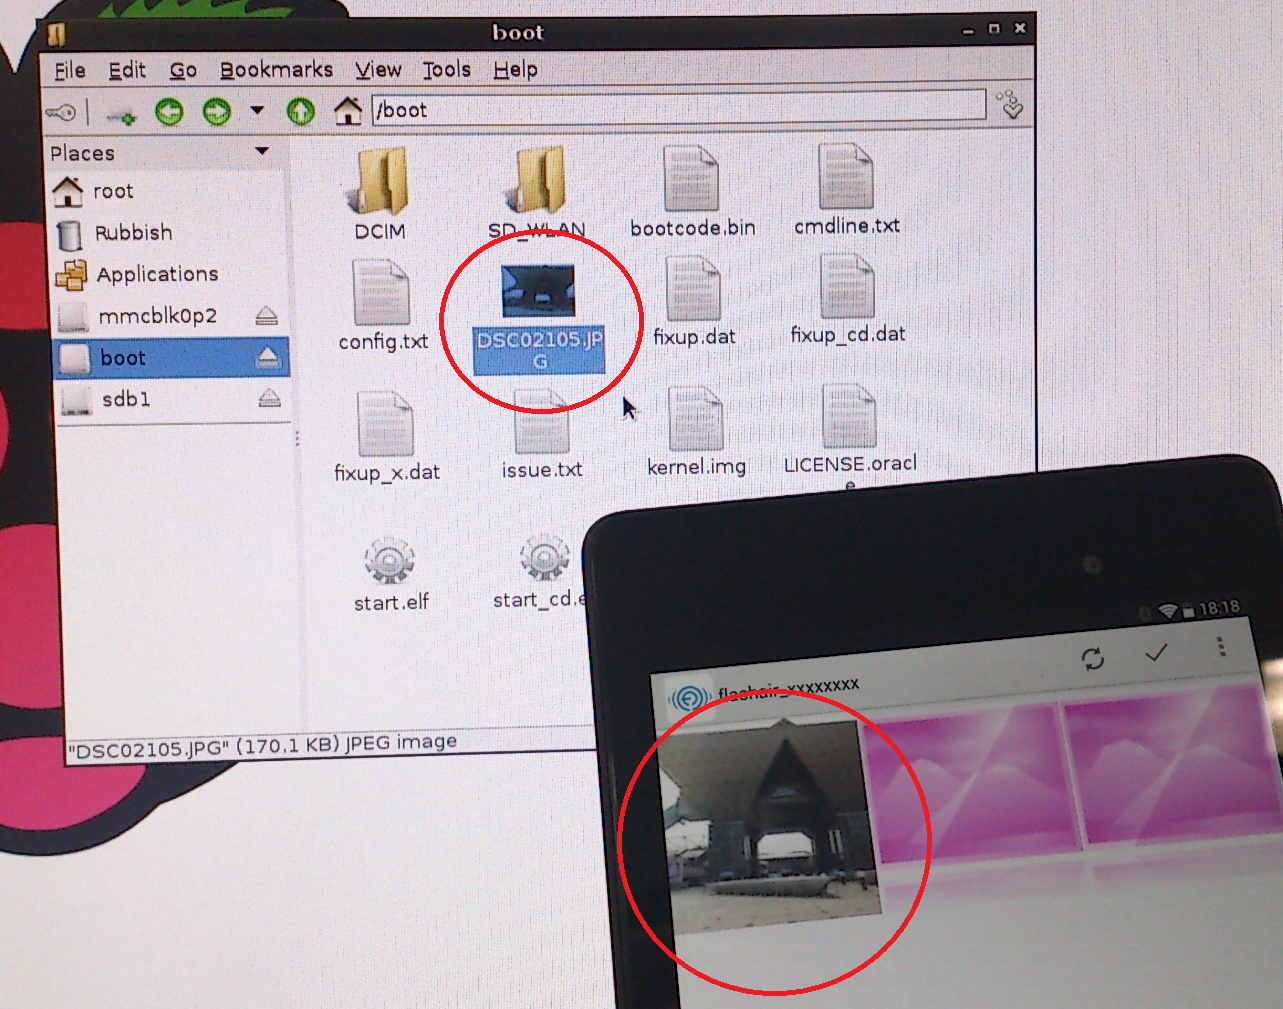
The 「/boot」folder of the Raspberry Pi via a wireless LAN displayed on smartphone!
Please contact the author if you have any questions.
 FlashAir™ Developers